


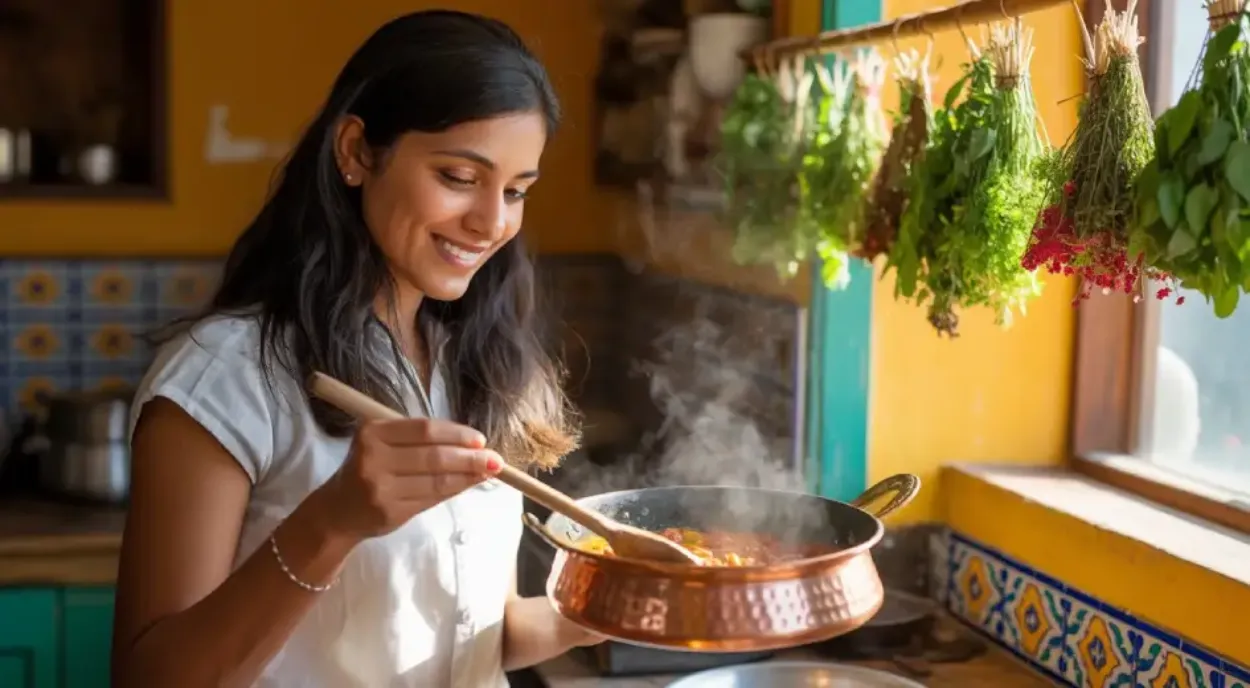
This easy chickpea curry is a creamy, one-pot vegan dish made with simple pantry spices. It comes together in about 30 minutes, making it a practical choice for busy weeknights. As a result, it’s become a regular on our dinner rotation.

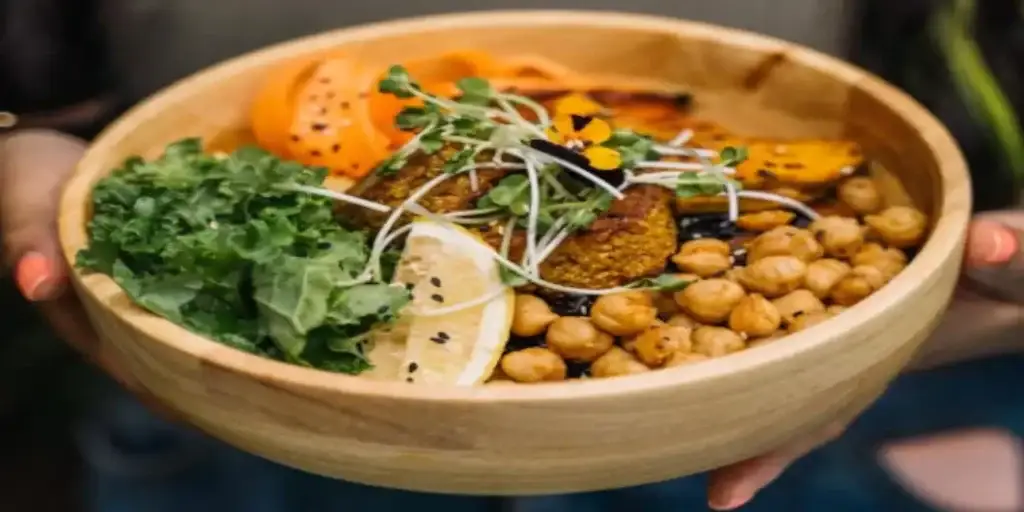
Power Bowl: Vegan Chickpea, Kale & Quinoa
If you’re looking for a healthy meal that is easy to make, full of nutrients, and truly satisfying, a Buddha bowl is a perfect choice. This vibrant vegan bowl with chickpeas and kale is a celebration of simple plant-based ingredients. It combines protein-rich chickpeas, nutrient-packed kale, and a variety of fresh colorful veggies, all brought together by a rich and creamy lemon tahini dressing. Perfect for a quick dinner, a healthy lunch, or meal prep, this bowl shows how delicious and fulfilling healthy eating can be.
The beauty of this dish lies in its harmony of textures and flavors. You get the satisfying crunch of roasted chickpeas and fresh vegetables, the soft, fluffy base of quinoa, the creaminess of ripe avocado, and the bright, tangy punch of the dressing. Each component plays a crucial role, creating a balanced meal that will keep you energized and satisfied for hours.
Why You’ll Love This Recipe
This isn’t just another salad; it’s a meticulously balanced plate designed for optimal health and taste. Here’s what makes it special:
-
Complete Nutrition: It delivers a perfect combination of complex carbohydrates (quinoa), plant-based protein (chickpeas), healthy fats (avocado, tahini, olive oil), and a wide spectrum of vitamins and minerals from its colorful array of vegetables.
-
Meal Prep Champion: The individual components store beautifully for 3-4 days, making it incredibly easy to assemble a healthy lunch in minutes throughout the week.
-
Endlessly Customizable: This recipe is a fantastic template. Use it as a guide and swap in your favorite grains, veggies, or proteins based on what’s in season or what you have in your refrigerator.
-
Naturally Vegan and Gluten-Free: It caters to a wide range of dietary preferences without any compromise on flavor or satisfaction.
Gathering Your Ingredients (Serves 2-3)
This recipe is built on whole, accessible ingredients. For the best flavor and texture, try to use fresh, crisp vegetables.
For the Bowl:
-
1 tin (425g) of chickpeas, drained and rinsed thoroughly
-
4 cups of fresh kale, stems removed and leaves finely chopped
-
1 cup quinoa, uncooked (rinsed well)
-
1 large carrot, julienned or coarsely grated
-
1 cucumber, diced
-
1 red bell pepper, thinly sliced
-
1 avocado, sliced just before serving
-
1/4 red cabbage, thinly sliced for a vibrant crunch
-
2 tablespoons pumpkin seeds or sunflower seeds, for garnish
-
Fresh herbs like cilantro or parsley, chopped, for a fresh finish
For the Lemon Tahini Dressing:
-
3 tablespoons tahini (well-stirred)
-
Juice of 2 lemons (about 1/4 cup)
-
2 tablespoons extra virgin olive oil
-
1 clove garlic, finely minced
-
1 teaspoon maple syrup (or agave nectar)
-
1/2 teaspoon ground cumin
-
Salt and freshly ground black pepper, to taste
-
2-3 tablespoons water, to thin the dressing to a pourable consistency
For the Roasted Chickpeas:
-
1 tablespoon olive oil
-
1/2 teaspoon paprika (smoked paprika adds a wonderful depth)
-
1/2 teaspoon ground cumin
-
1/4 teaspoon garlic powder
-
Salt and pepper to taste
Crafting Your Bowl: A Step-by-Step Guide
The process of building this bowl is simple, but a few key techniques ensure the best possible result.
Step 1: Prepare the Quinoa Base
Thoroughly rinse the quinoa under cool water in a fine-mesh strainer until the water runs clear. This crucial step removes its natural bitter coating, called saponin. In a medium saucepan, combine the rinsed quinoa with 2 cups of water. Bring to a boil, then immediately reduce the heat to low, cover, and simmer gently for about 15 minutes. Remove from heat and let it stand, still covered, for 5 minutes. Finally, fluff it gently with a fork. This resting period allows the grains to separate perfectly, creating a light and fluffy base for your bowl.
Step 2: Create the Crispy Roasted Chickpeas
Preheat your oven to 400°F (200°C). After rinsing, pat the chickpeas completely dry with a clean kitchen towel or paper towels—this is the secret to achieving maximum crispiness. In a bowl, toss the dried chickpeas with olive oil, paprika, cumin, garlic powder, salt, and pepper until evenly coated. Spread them in a single layer on a parchment-lined baking sheet. Roast for 20-25 minutes, shaking the pan halfway through, until they are golden brown and deliciously crispy.
Step 3: Massage the Kale
Place the chopped kale in a large bowl. Add a tiny drizzle of olive oil and a pinch of salt. Using your hands, massage the kale for 1-2 minutes. You will feel the leaves begin to soften and darken in color. This simple process breaks down the tough, fibrous cellulose structure, making the kale tender, sweeter, and much more enjoyable to eat raw.
Step 4: Whisk Together the Dressing
In a small bowl or jar, combine the tahini, fresh lemon juice, olive oil, minced garlic, maple syrup, and cumin. Whisk vigorously. The mixture may seize up and thicken initially—this is normal. Slowly add water, one tablespoon at a time, whisking continuously until the dressing becomes smooth, creamy, and reaches your desired pourable consistency. Season generously with salt and pepper.
Step 5: Assemble Your Masterpiece
Now for the fun part: assembly! Divide the fluffy quinoa between 2-3 bowls. Artfully arrange your prepared ingredients in sections around the bowl: the massaged kale, crispy roasted chickpeas, julienned carrot, diced cucumber, sliced bell pepper, and vibrant red cabbage. Top the bowl with fresh avocado slices, a sprinkle of pumpkin seeds, and a generous drizzle of the creamy lemon tahini dressing. Finish with a garnish of fresh herbs.
Serving Suggestions and Expert Tips
– Serve Immediately: For the best textural experience, assemble and serve the bowl immediately while the roasted chickpeas are still warm and crispy.
– Meal Prep Like a Pro: Store all components separately in airtight containers in the refrigerator. The dressing can be stored in a jar for up to 5 days. Assemble your bowls just before eating to maintain perfect texture.
– Customize Your Creation: This recipe is a canvas. Feel free to add other roasted vegetables like sweet potato cubes or beetroot, or toss in cherry tomatoes for a burst of sweetness.
– Dressing Variations: If you don’t have tahini, a simple vinaigrette with lemon juice, olive oil, dijon mustard, and a touch of maple syrup makes a fantastic alternative.
A Deep Dive into the Nutritional Benefits
This Buddha bowl is a nutritional powerhouse designed to fuel your body and mind. The quinoa and chickpeas provide a complete protein profile, containing all nine essential amino acids. The avocado and tahini contribute heart-healthy monounsaturated fats, which are crucial for nutrient absorption and hormone health. The kale is a superstar, loaded with iron, calcium, and vitamins A, C, and K. The red cabbage and bell peppers are bursting with antioxidants and vitamin C. Speaking of vitamin C, the lemon-based dressing is not just for flavor; it significantly enhances the body’s ability to absorb the non-heme iron present in the kale and chickpeas, making this bowl a perfect example of synergistic nutrition.
Prep Time: 20 minutes
Cook Time: 25 minutes
Total Time: 45 minutes
Serves: 2-3
Nutritional information on this site is for general informational purposes only and is not intended as medical advice. See our Disclaimer page for more details.